Even with a pair of broken in boots that fit well, your feet may get sore after so much hiking on Kilimanjaro. Luckily, there are a few lacing techniques that can relieve pressure or help secure your but to reduce friction and blistering.
Issue: Loose around heel or instep
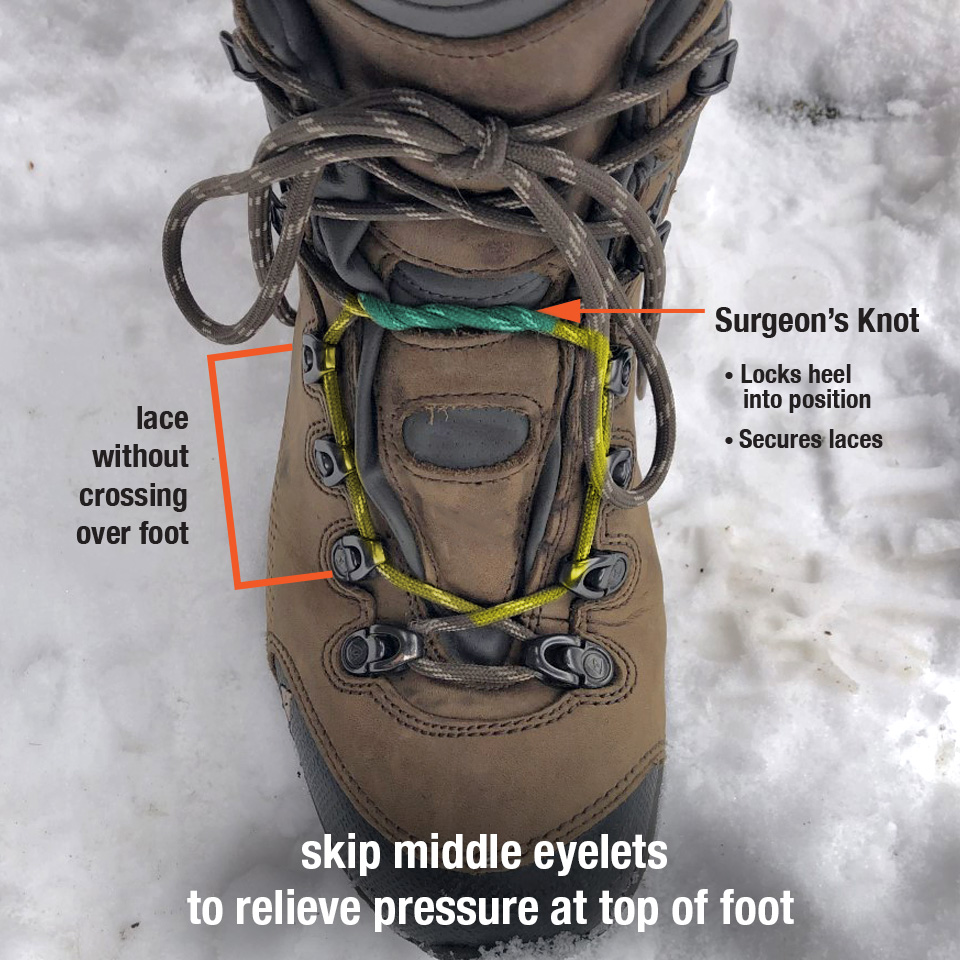
Lacing Technique: Surgeon’s Knot
If your boot becomes loose around the heel or the instep, you can use surgeon’s knots to bring the boot in tight around an area and lock it into place. You can also use this knot to tightly secure a specific row of eyelets and make one area of your boot tighter or looser than another.
Surgeon’s knots are most commonly used at the top of the instep/bottom of shin to lock the heel into position. They can also keep your foot from moving forward in your boot so your toes don’t cramp during steep declines.
You can use a surgeon’s knot elsewhere to isolate specific areas of your boot where you want a snugger fit such as closer to your ankle.
Issue: High Arches / Pressure at top of foot
Lacing Technique: Skipping Eyelets
If you have high arches or your foot tends to swell, the top of your foot may rub against your boots. You can relieve some of this pressure simply by hooking your laces into two adjacent eyelets without crossing over your foot. A surgeon’s knot above and below this section can help hold this area more securely while relieving pressure from the top of your foot.

Issue: Pressure at toes
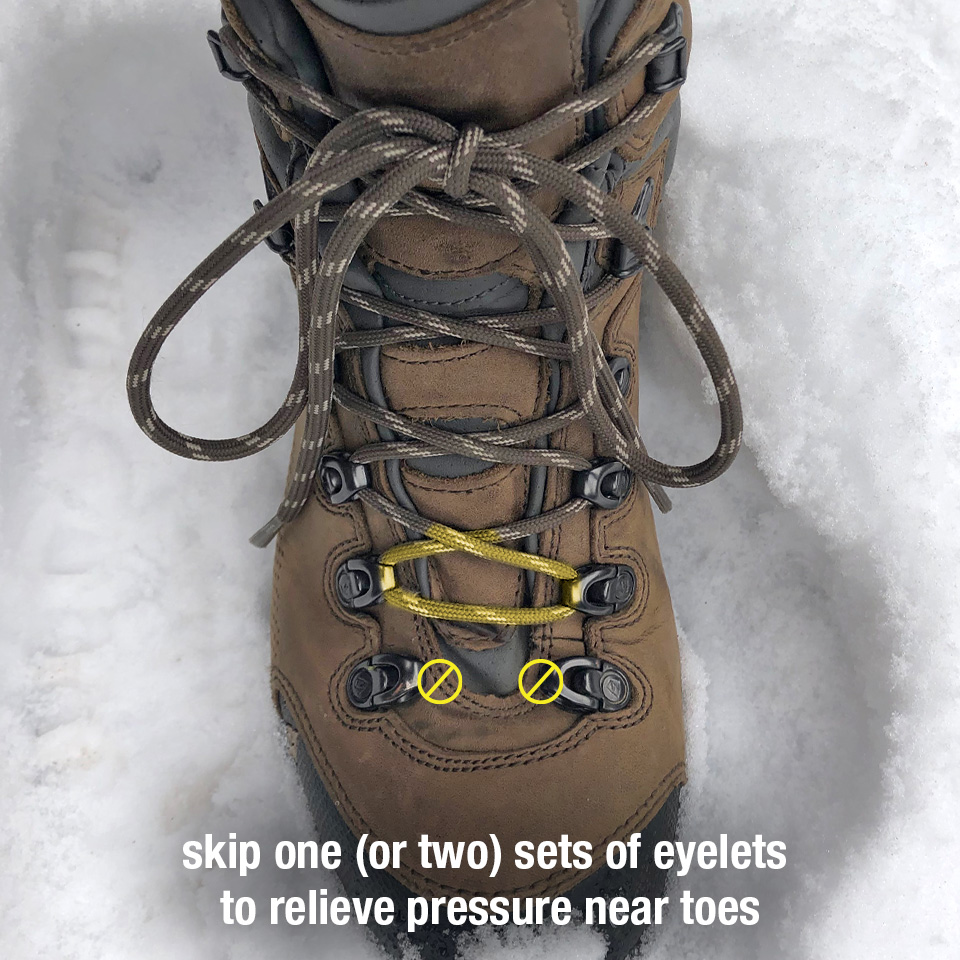
Lacing Technique: Skip first set of eyelets
If you’re feeling pressure around your toes, unlace your boots, skip the first set of eyelets and lace them like you normally would the rest of the way.
If you’re still feeling pressure, you can try switching to a thinner pair of socks. Otherwise, you may want to look for boots in a larger size.


